How to Build Circuits at Home: Tools and Components Every Beginner Needs
Breadboard
Circuit
A growing trend is learning how to make circuits at home. Creating circuits is possible to do at home with the right tools and determination. This step-by-step guide for beginners will outline what tools are needed for making these circuits, what components will be necessary to make these circuits in the first place, and how to use them. Let's dive into what tools are needed to make circuits by yourself.
What are Breadboards?
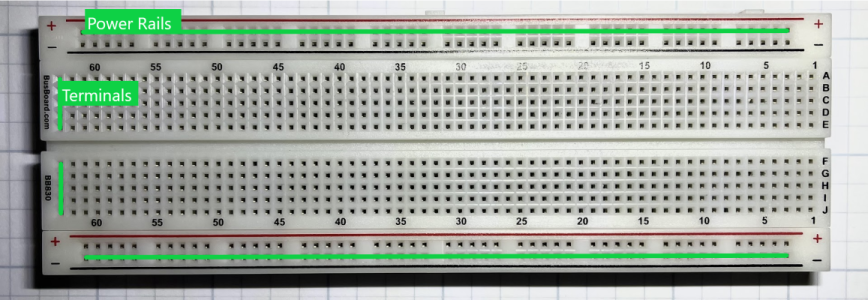
Breadboards are a beginner-friendly tool to use to make circuits quickly and easily without any advanced techniques like soldering.
- Each separate terminal is vertically connected and split by the middle as shown in the diagram.
- All 4 separate power strips are connected horizontally.
The reason for these specific internal connections on a breadboard will become clearer when we dive into the separate components.
Top 4 Best Tools For Breadboard Circuitry
These are the most common tools used for making circuits on breadboards.
1. Pliers, Wire Stripper, and Wire Cutter 3-in-1
What is it?
This device has saved me countless hours of using my pocket knife to very carefully cut around the wire's core and very carefully remove the insulation - trust me, this tool is a life (and potentially finger) saver. This tool requires no experience, making it very useful for beginners.
- Pliers - can be useful in taking out wires on a breadboard that your fingers can't seem to grab.
- Wire Stripper - can strip the wires and reveal the metal needed for electrical conductivity.
- Wire Cutter - cuts wire for stripping and can adjust wire length as needed.
This tool is highly recommended.
How to use it
2. IC Extractor
On breadboards, removing ICs can be a painful process for you and your IC. The IC extractor tool can save your ICs from scratches that could potentially damage them. Note: ICs (integrated circuits) are more complex circuits miniaturized into a little black box.
These devices have saved many ICs from the wear and tear of wrestling an IC from the breadboard, which end up with scratches and bent pins.
How to use it
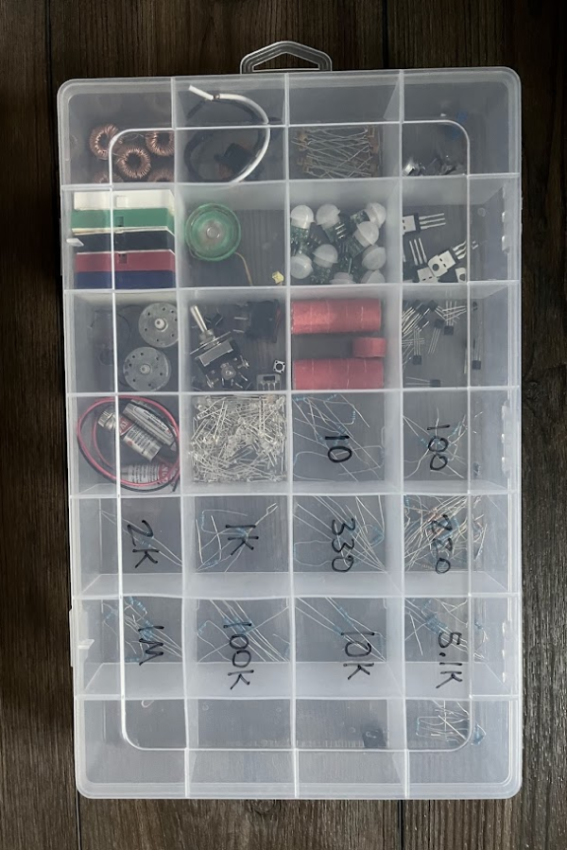
3. Fishing Tackle Box
A fishing tackle box is a great way to organize your electronic components (motors, LEDs, resistors, etc.). It keeps your components portable, easy to find, and well organized. This saves me a ton of time, because I can pull out my tackle box and find whatever I need.
This, of course, is optional, but it does save a lot of time when looking for components.
How to use it
Here's a picture of my tackle box that sorts out resistors, transistors, and other components.
4. Wire (22 AWG)
Wire, while it may seem like an obvious tool for circuitry, has some considerations to look into. For breadboards, using solid core wire (wire that is able to hold its shape when bent) is the best option. Additionally, using wire that fits into the breadboard's connection points is mandatory as well.
There are two kinds of wires for a breadboard. The most beginner-friendly are jumper wires. Unlike the wire that needs to be cut and stripped, jumper wires are long and messy. It depends on what you are going for, and where your experience level is at.
Solid Core Wire (Jameco)
Jumper Wires (Jameco)
How to use it
As demonstrated with the pliers, you use a wire cutter and stripper to get the wire to the right length and shape for breadboard use. Jumper wires are able to be put right into the breadboard.
The 4 Common Components and How to Use Them
This section will be focused on the four most common components: LEDs, resistors, diodes, and capacitors. See the "Component Packs" section for purchasing these components on Jameco. These products are an assortment of many different values of each component. With many different values for the components, you can have what you need on hand right away quickly and easily.
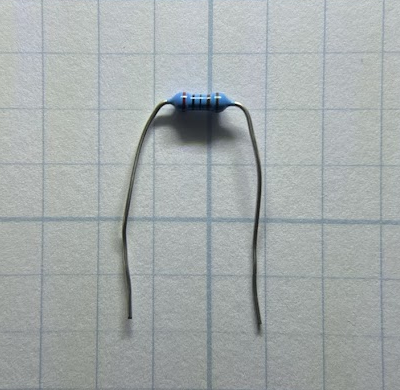
What are Resistors?
A resistor is mainly used for protecting devices from burning out due to too much current flowing through them. A resistor can limit current and decrease voltage. They are most commonly used with LEDs. If interested, I recommend checking out the article about Ohm's law and resistance.
How to use a resistor
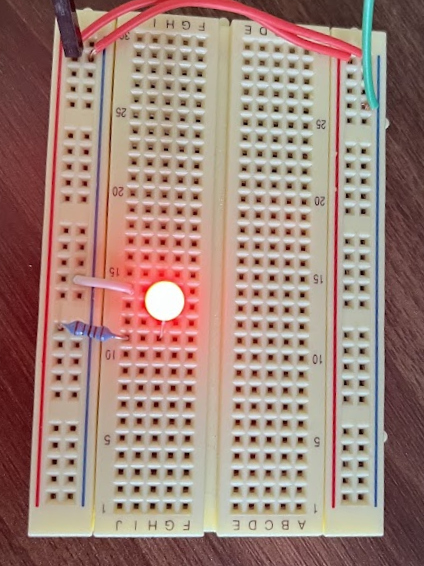
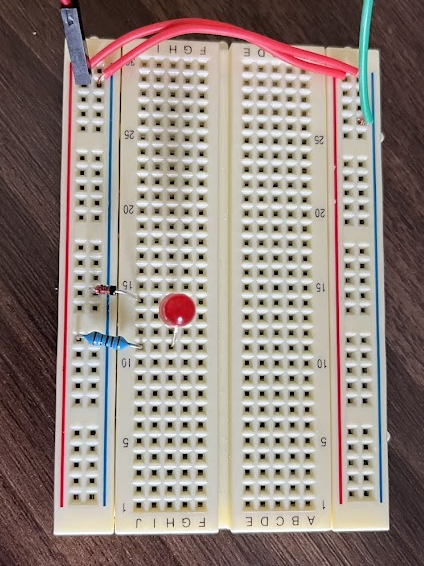
In circuits, resistors are wired in a way that the only path to the device being protected by the resistor is through the resistor. I have set up a simple circuit that has a resistor protecting an LED:
What are LEDs?
LEDs (short for light-emitting diodes) give off light when current is applied to them. They are most commonly used for:
- An indicator to check if a part of a circuit is working
- A display tool for games or project feedback
How to use and LED
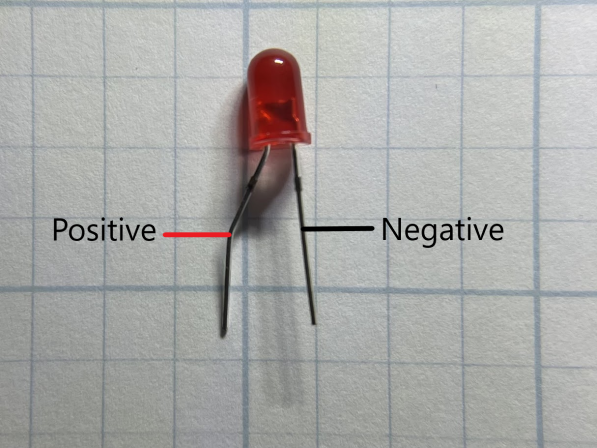
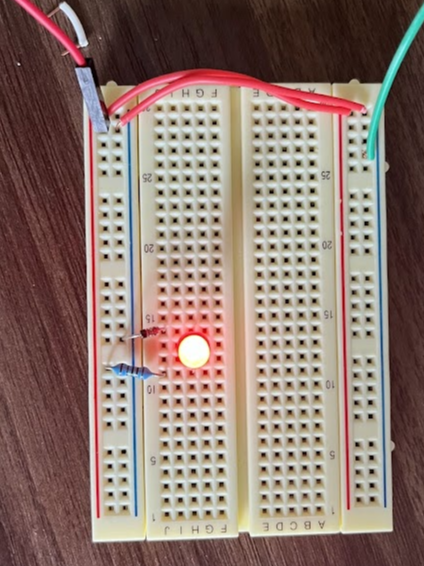
LEDs have two pins: the positive pin (longer) and the negative pin (shorter). Always use a resistor with an LED to prevent burning it out. To demonstrate, we will be using the same circuit as from the resistor section.
What are Diodes?
A diode is a two-terminal electronic component that allows current to flow in only one direction. Diodes are often used for:
- Protecting circuits. Diodes can block reverse voltage, preventing damage to sensitive components.
- Converting AC to DC. In power supplies, diodes are used in rectifier circuits to convert alternating current (AC) into direct current (DC).
How to use a diode
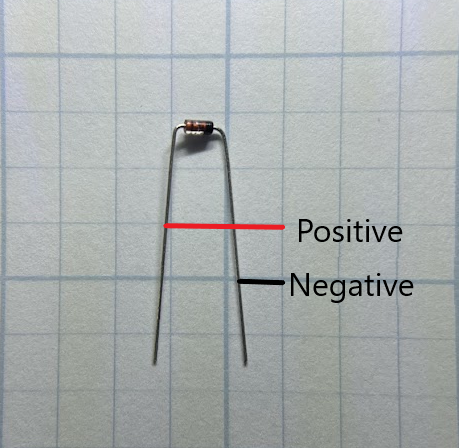
Diodes are marked with a stripe on the negative side. Connect the positive pin to power and the striped pin to the rest of the circuit. If current flows in the wrong direction, the diode will block it to protect the circuit. This does not damage the diode. Here is an example of a diode not allowing current to flow through an LED:
This is the same circuit with the diode flipped around:
What are Capacitors?
A capacitor is an electronic component that stores and releases energy. Unlike batteries, capacitors are not meant for long-term energy storage. These fundamental components were made possible by Faraday's Law. Capacitors are commonly used for:
- Smoothing voltage. Capacitors help stabilize the power supply by filtering out voltage spikes or dips.
- Timing circuits. In combination with resistors, capacitors are used to control timing functions like delays or oscillations. Take a look at our article on how to use a 555 timer.
How to use a capacitor
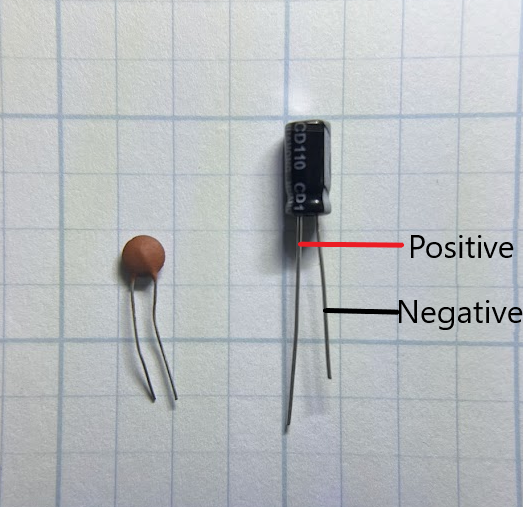
Capacitors come in polarized and non-polarized types. For polarized capacitors:
- Positive pin (longer) is positive
- Negative pin (shorter and maked with negative sign) is negative
When placing a polarized capacitor on a breadboard, make sure to use the correct orientation to avoid damaging the component. Non-polarized capacitors can be placed either way. Here is a circuit that uses a polarized capacitor with an LED:
Conclusion
Understanding basic electronic components like LEDs, diodes, and capacitors is essential for anyone getting started with electronics or breadboarding. LEDs help you visualize your circuit's behavior, diodes offer protection and direction control, and capacitors help with energy storage and voltage stability. By learning how to use each component correctly—including their pinouts, orientation, and safe wiring practices—you'll build a strong foundation for more complex and reliable circuits.
To learn more about breadboard circuits, check out our article on building logic gates with transistors or common logic gate circuits in real life.
